HOE MAAK JE EEN DJ-MIX IN ABLETON LIVE
In een wereld van digitaal DJ'en zal elke DJ of artiest op een gegeven moment waarschijnlijk een DJ-mix willen doen opnemen. Misschien is het voor een radioshow, voor op Soundcloud of misschien wil je je eigen mixserie op Mixcloud starten. Waar je mix ook voor is, dit is een tutorial om je op weg te helpen om je mix geweldig te maken.
HET VINDEN VAN TRACKS
Dit klinkt misschien wat voor de hand liggend, maar het selecteren van de juiste tracks is eigenlijk de essentie van DJ zijn. Voor een housemix van 60 minuten is het gebruik van 12 - 18 tracks een goed uitgangspunt. Selecteer de tracks op energie, sfeer en tempo. Je kunt de tracks ook op toonsoort selecteren, bijvoorbeeld met ‘Mixed In Key’.
2. DE SET VOORBEREIDEN
Laten we eerst een paar audiokanalen maken. We willen één audiotrack voor elke track in de mix, maar je kunt ook een twee kanaals opstelling maken. Zo switch je tussen audiotrack 1 & 2 gedurende de hele mix. Wij houden de tracks graag gescheiden, dus wij maken we een track voor elk nummer in de mix. We hebben de gain (volume) voor elke track ingesteld op -6dBs, zodat we de kanalen niet clippen.
Vervolgens voegen we het Ableton Audio Effect 'EQ Three' toe aan elk kanaal. Dit apparaat maakt het super eenvoudig om frequenties in en uit te mixen, 'DJ-Style'.
3. Tracks importeren
Om te beginnen met het importeren van nummers, zoek je ze op op je computer.
Een tip is om de map met jouw muziek toe te voegen in je Ableton browser, door op ‘Map toevoegen…’ te klikken. Je zou nu je trackmap moeten zien en als Ableton de tracks heeft ingescand, sleep je de eerste track naar het eerste kanaal van je project.
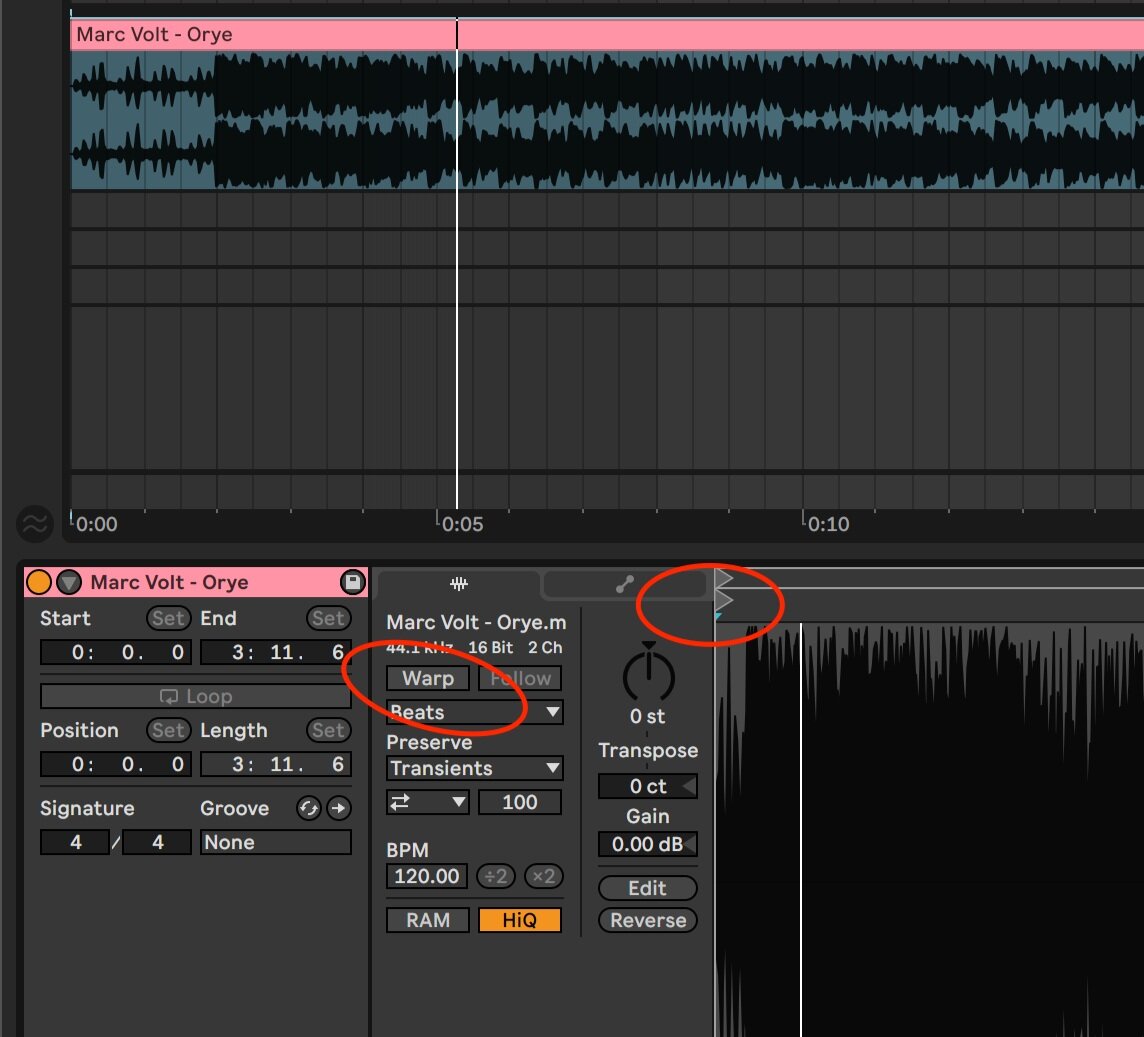
De track begint nu automatisch met analyseren, maar deselecteer voor deze techniek voorlopig de knop 'Warp' in het voorbeeldmenu.
4. SYNCING THE TRACK.
To match the track’s BPM to the project tempo, we need to make sure Live knows the BPM of the loaded track. First, we locate the start marker of the track. This is the line with the little triangle on top. We zoom in on the track in the sample section, to find the first transient of the loaded track. This is the very start of the track.
5. WARPING THE TRACK TO MATCH THE TEMPO.
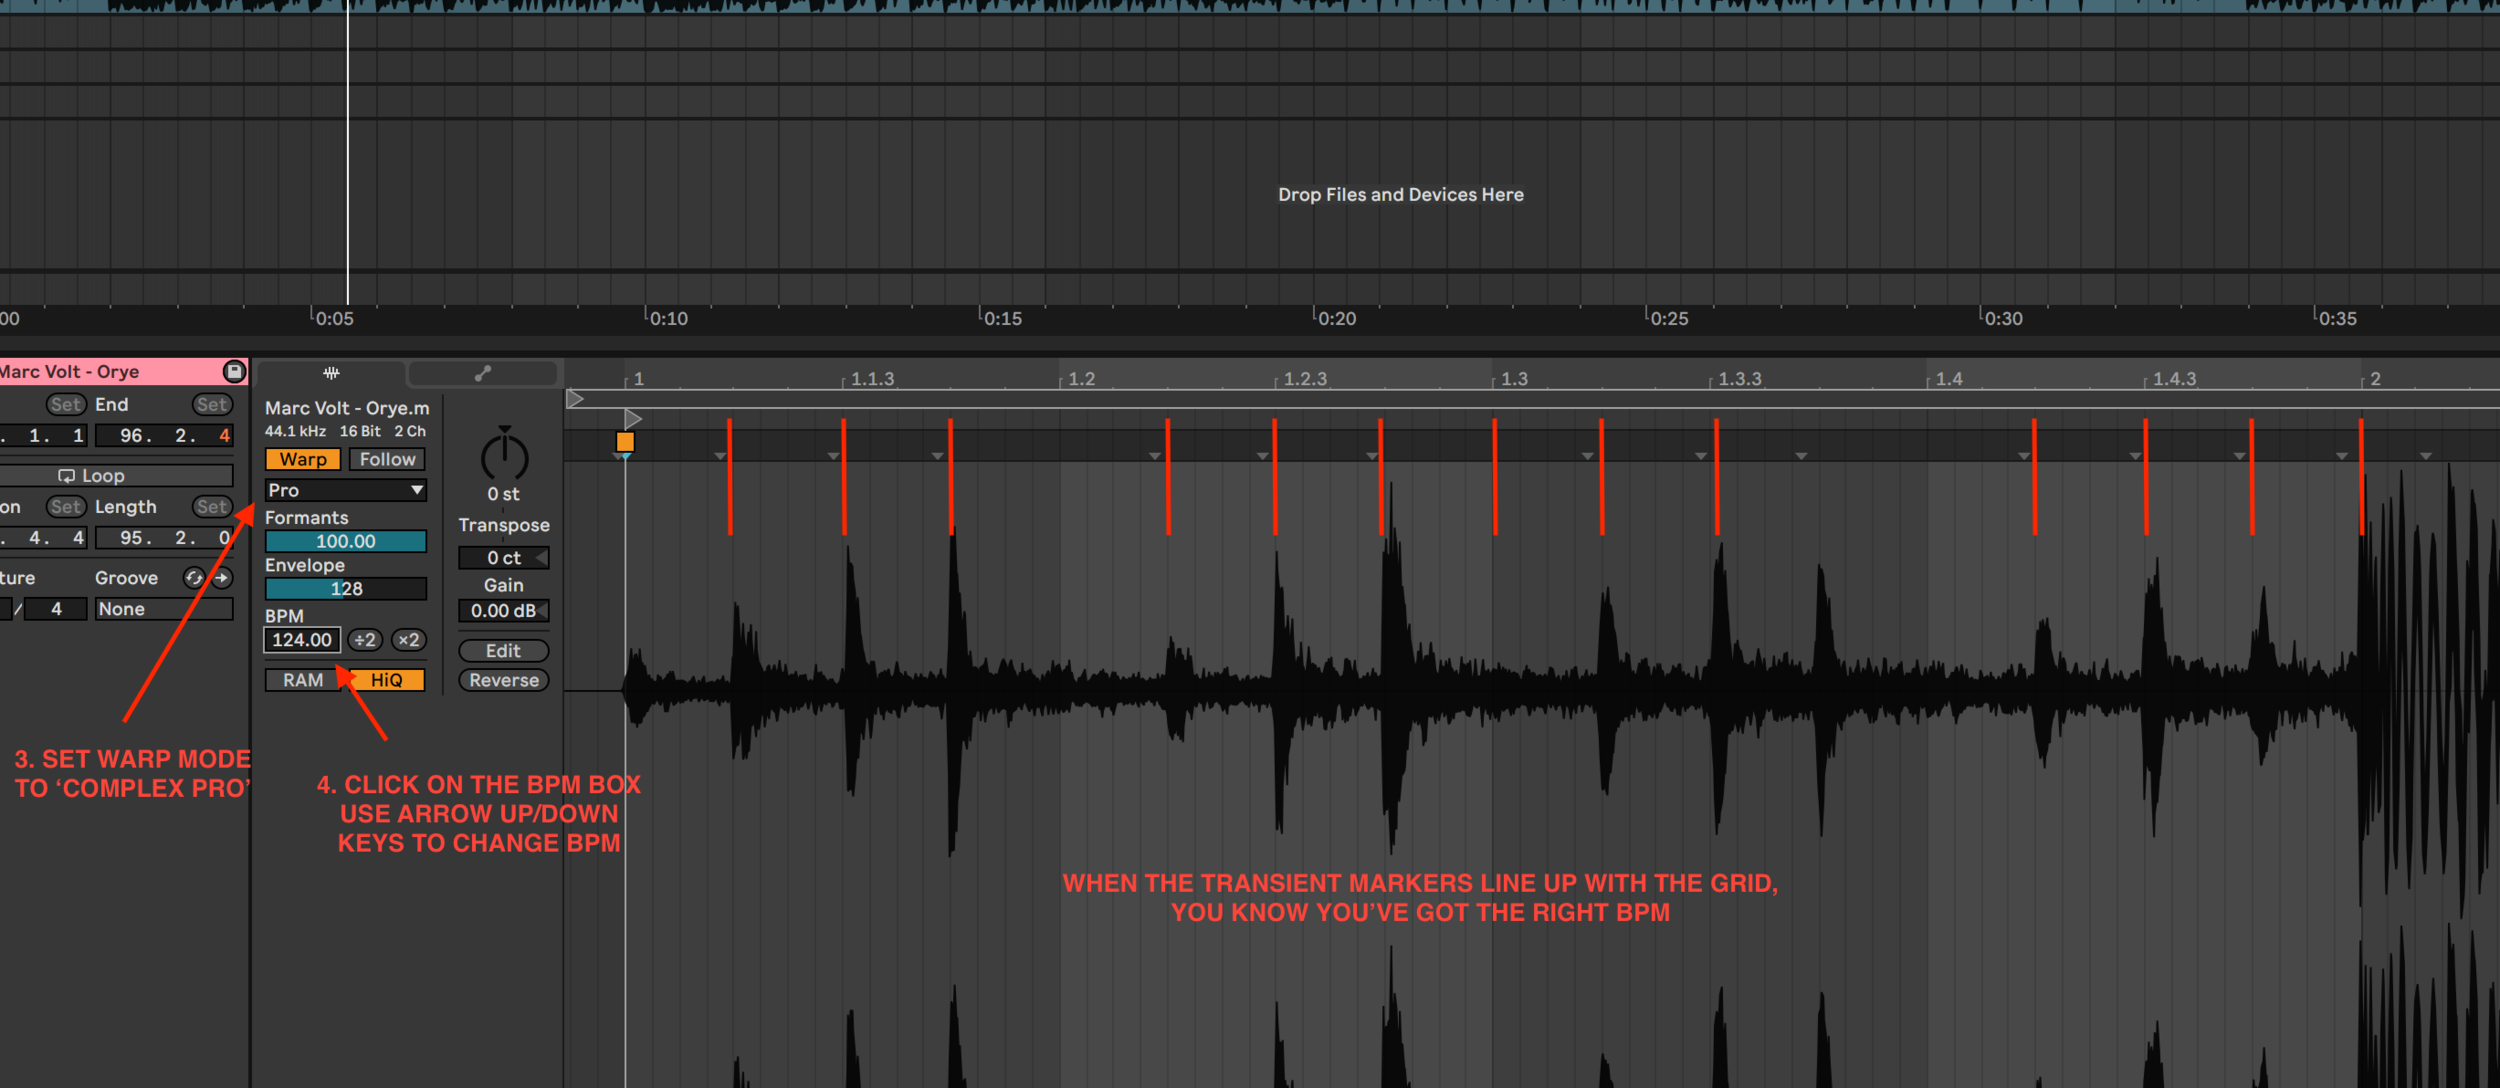
To make sure the track will be in sync, we need to find the original BPM of the loaded track. We do this after turning on Warp. With the BPM box selected, we move up and down with our arrow keys on our keyboard. The BPM now goes up and down by 1. When you know the BPM of the track, you can simple type it in the BPM box. You can check if it’s correct by checking if the transient markers are lined up with the grid. We use Complex Pro for the warping, this is the most versatile warp mode when it comes to warping samples.
6. MAKING A TRANSITION.
In a DJ-mix, transitions are the most exciting parts. We are going for a basic transition here, with a simple bass-switch and volume automation. For EQ’ing in-and-out the bass we use ‘EQ Three’. For volume automation we will just use the track volume.
First, let’s locate the intro and outro of a track. Ideally, we use ‘Extended Mixes’ for a DJ mix. These are version of tracks with an extended in- and outro, used in when mixing tracks.
Find out where you want the transition to happen. Usually, we make the transition when a phrase of a track ends or starts. We make sure there is only one track playing with the bass in. When you play two tracks at once, having both basses up will result in a very busy, clashing mix. For this example, we synced two tracks to the project tempo, and lined them up so that the intro overlaps the outro of the previous track.
Right click the track volume, select ‘Show Automation, and draw in automation for fading in and out the tracks like this:
Right click the ‘LOW’ band on the EQ Three, select ‘Show Automation’ and draw in the automation for bringing in and removing the bass like this:
Now you know how to make a transtition. You can continue this for the rest of your mix.
7. Marking tracks for easy track listing
When making a DJ mix, you most likely need to have a track list for it. When I do my weekly podcast, I use this method for track listing it, and adding timestamps too. I highly recommend using timestamps.me for the timestamps, this has saved me lots of time in the past. You can upload your live set on the website when you’re finished, and it will roll out the timestamped track list for you. Awesome!
When hovering over the time ruler in on top of your project, right click and select ‘Add Locator’ on your transition point. Add the track title.
When you’ve added some locators, it should look something like this:
8. EXPORTING YOUR MIX
Your mix is done, you double checked it, and want to get it out to your listeners as soon as possible! To make sure your mix is consistent in levels, we like to add a Limiter to the master channel. When using the Ableton stock limiter, bring up the gain to 5.5dBS. You now bring up the levels again after lowering them in the mixing process to prevent clipping.
After limiting your mix. Go to Export Audio/Video in the menu bar, and export in your desired format. We recommend using mp3 for streaming services such as Mixcloud and Soundcloud. Go for 16BIT .Wav if you’re exporting for radio broadcasting.


